


Kids Murphy Table
Difficulty
Beginner
| 
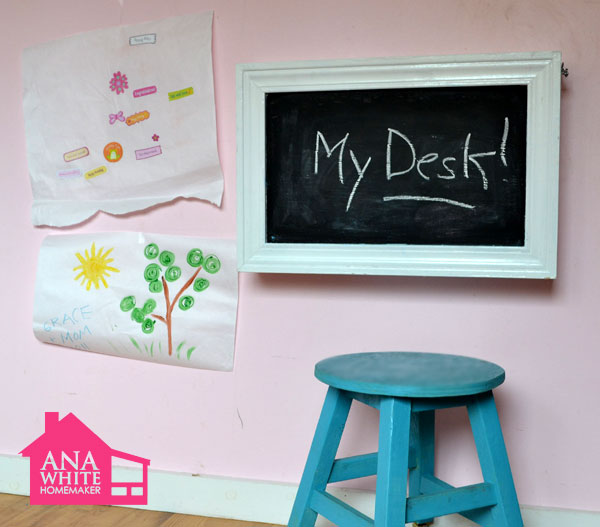
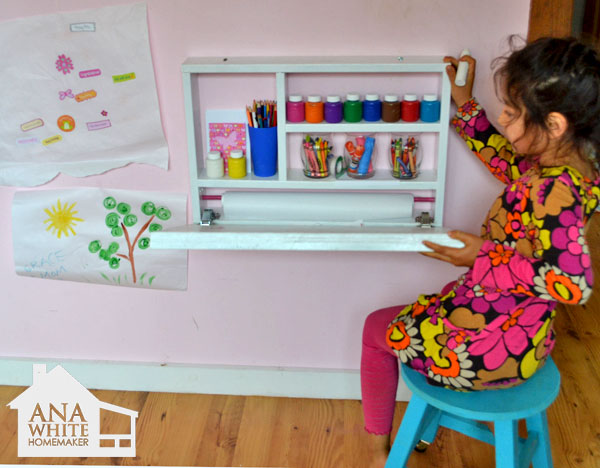
This do it yourself kids desk folds up to become a wall chalkboard! Stores art supplies and even a paper roll holder! Super easy step by step instructions to DIY your own!

Perfect for an Kid's Art Desk
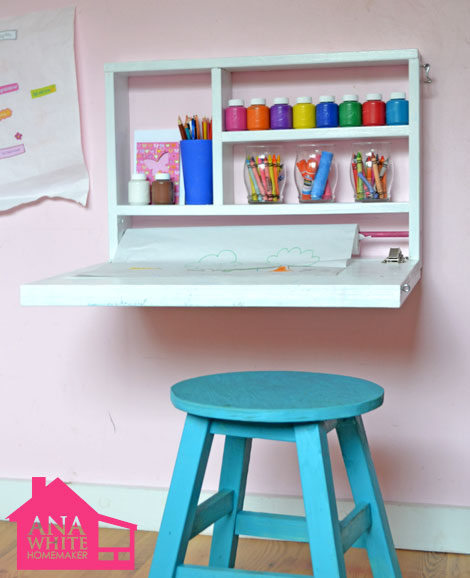
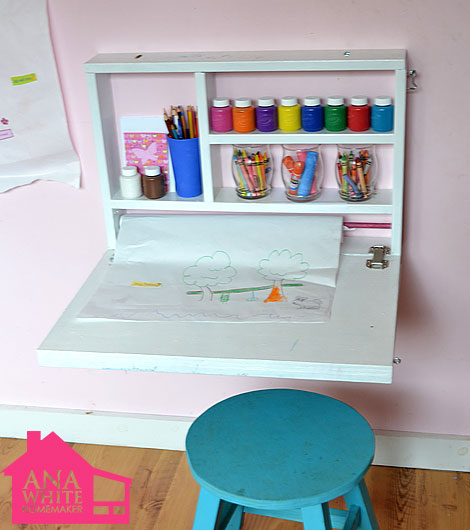
It's just right in size for an art station! I love that art supplies are all kept right where they are used.
Tiny Space Solution
We love that this desk can work anywhere and takes up no floor space!
Storage Too!
This desk, when closed, takes up NO floor space, and acts as a chalkboard for playing school. But when opened, the desk not only creates a perfect for kids coloring height desktop, it opens up a dedicated area for storing art supplies. And I've even put in a spot for a craft paper roll!

Easy Systems
With this system, the supplies are stored where they are used. That's what? fifteen minutes less for me of picking up crayons a day? Adds up . . . 92 hours a year!!!

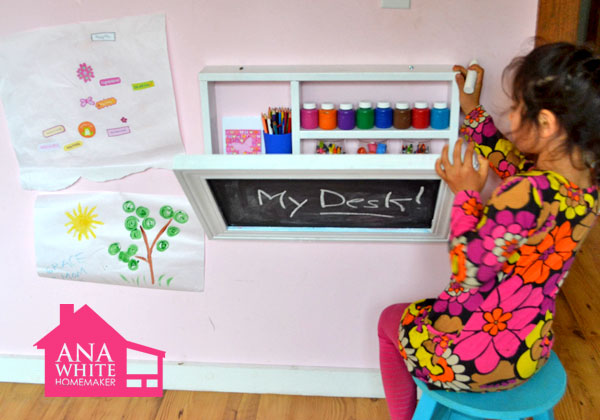
Mount at Any Height
I mounted this desk at Grace's preferred height of 22" to the desktop, but you can mount it at any height. Hannah is seven, and the desk is still just the right size for her.
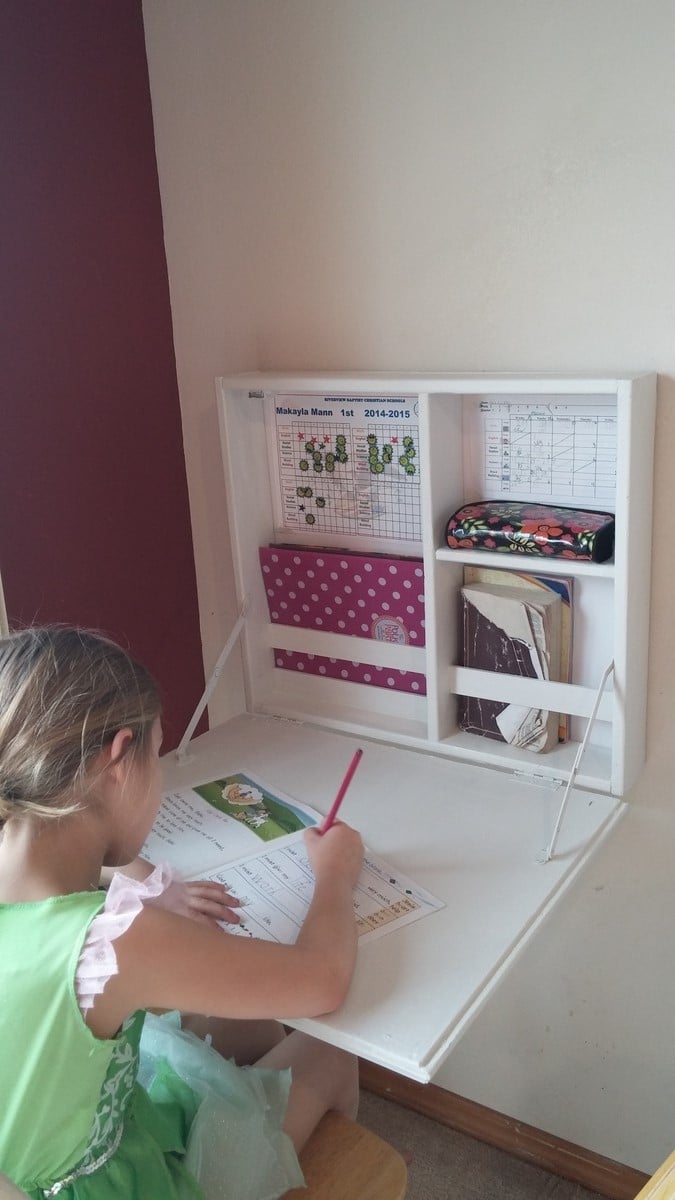
Easy to Use
I installed a simple hook and eye closure to keep the desk shut. To use, just remove the hook and eye and fold open.
Support Brackets
You can use a wire and chain as a support (as I did) mounted on the exterior, or you can use a support hinge bracket as done below. NOTE: You may need to adjust the shelving inside the cabinet to give room for the support hinge to close. I suggest purchasing your hardware BEFORE building and adjusting your shelf locations to fit.
Dimensions

You can alter the width of the desk, but do not go any deeper - the support is not there!
Preparation
Shopping List
- 1 - piece 3/4" plywood 16" x 24"
- 1 - 1x4 @ 10 feet long
- 1 set hinge supports or wire or chain (see comments)
- 1 set basic hinges
- 3 D ring hangers
- Chalkboard paint (optional)
- Moulding or trim (optional)
Common Materials
2 inch screws
2 inch finish nails
120 grit sandpaper
primer
paint
paint brush
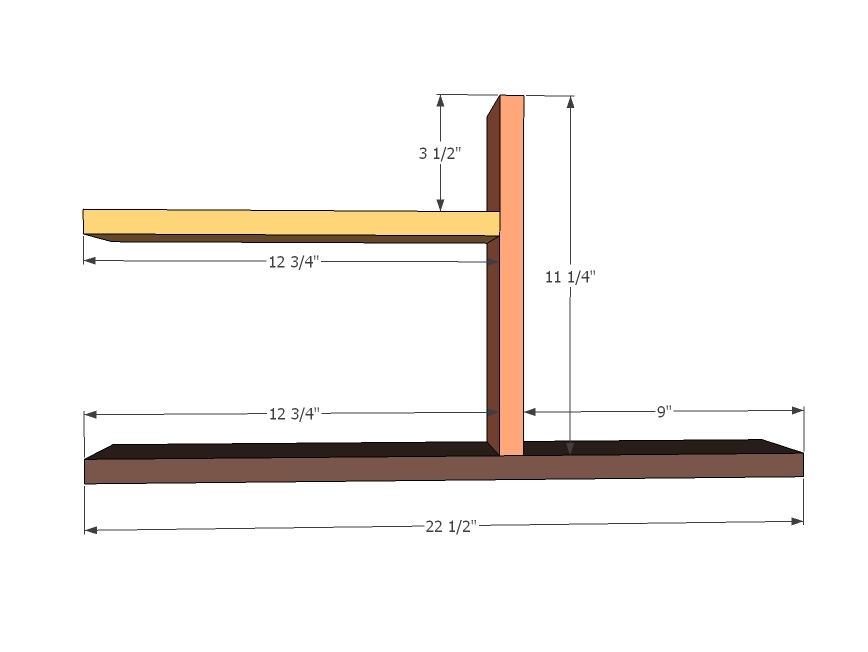
Cut List
1 - 1x4 @ 11 1/4"
1 - 1x4 @ 12 3/4"
2 - 1x4 @ 14 1/2"
2 - 1x4 @ 24"
1 - 3/4" Plywood @ 24" x 16"
1/2" dowel, 30" long (optional for the paper roll)
General Instructions
Please read through the entire plan and all comments before beginning this project. It is also advisable to review the Getting Started Section. Take all necessary precautions to build safely and smartly. Work on a clean level surface, free of imperfections or debris. Always use straight boards. Check for square after each step. Always predrill holes before attaching with screws. Use glue with finish nails for a stronger hold. Wipe excess glue off bare wood for stained projects, as dried glue will not take stain. Be safe, have fun, and ask for help if you need it. Good luck!
Instructions
Step 1
I built this project with 2" finish nails, but you can also use screws or the Kreg Jig.
Start in the center and work your way outward so you don't get caught in a corner. Mark all joints and fasten with glue.
Please read all comments when installing the hinge supports - per reader comments, depending on your hinge supports, you may need to add extra clearance for the supports.
Step 2
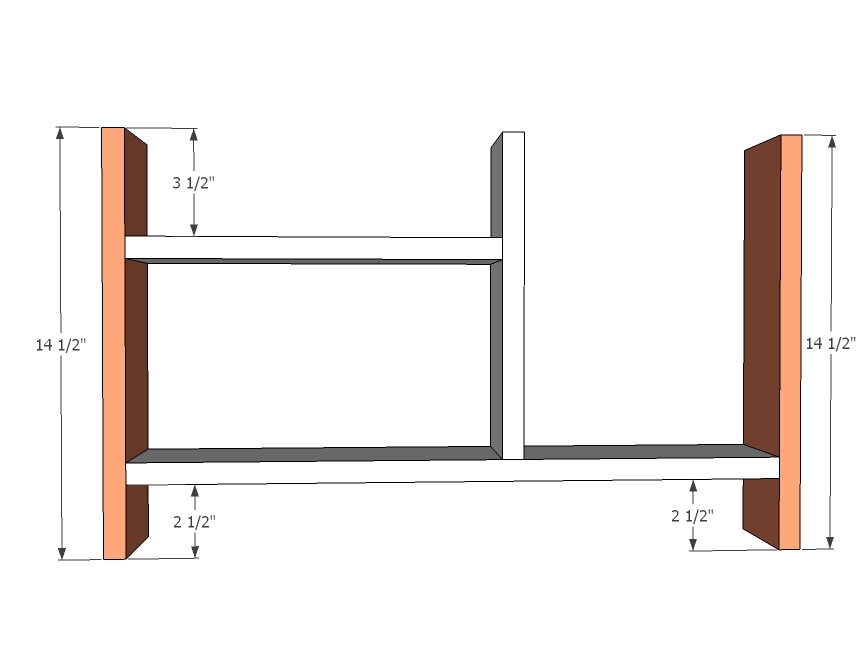
Mark joints and attach in place.
Step 3
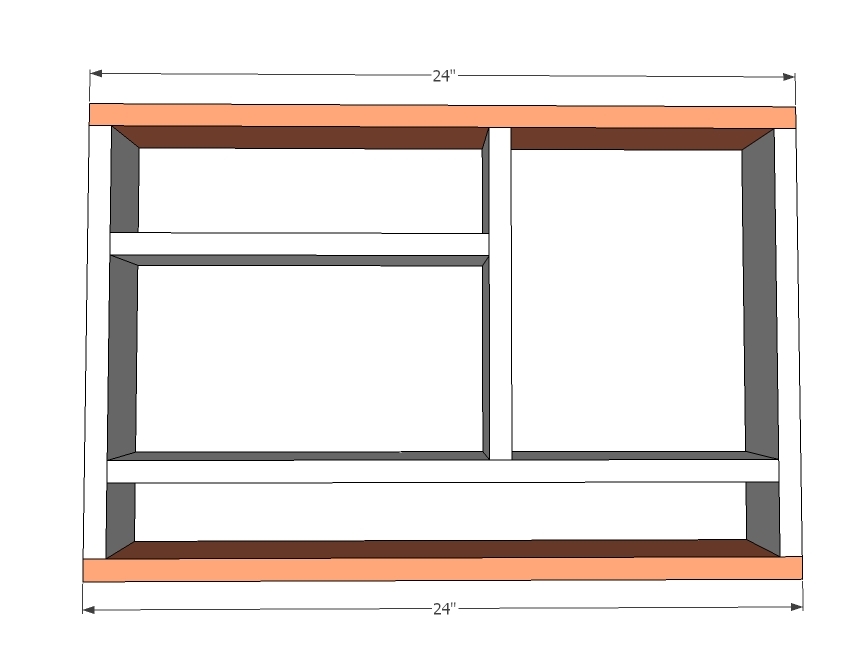
Now the top and bottom. Drill 1/2" diameter holes for paper roll here. Leave dowel long so you can roll the outside ends to roll up the craft roll.
Step 4
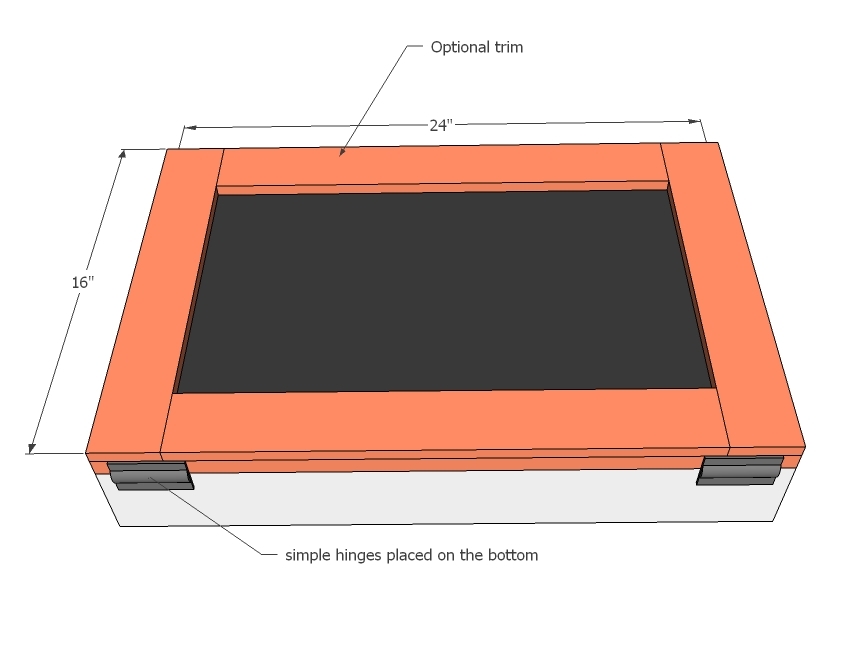
You do not have to put the trim on, I did because my chalkboard edges were so ugly! I used window casing, but you can use anything. Attach the top with simple hinges on the bottom.
Step 5

Use D Ring hanging brackets to hang on the wall. Be SURE to attach to at least one stud in the wall, and properly hang in drywall on two other locations.
Step 6
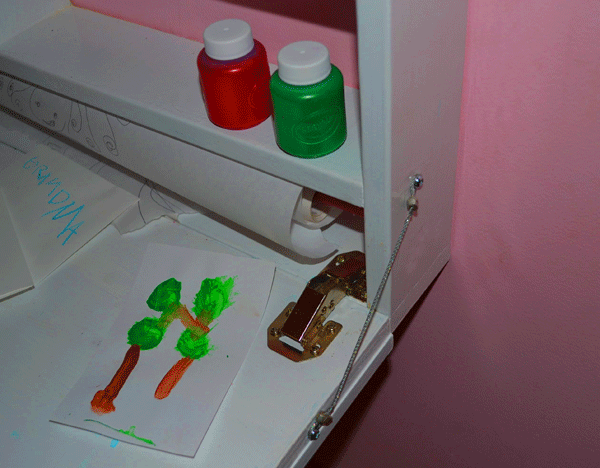
UPDATE: Per reader comments, this desk may not fit standard support hinges with the paper roll holder. I used a simple chain on the outside coupled with euro style non mortise hinges that already provide support and it's plenty strong. If I had placed the hinges inset more, the chain could have been put on the inside of the desk as well - but it just worked out better on the outside for me.
Other workarounds could be flipping the desk over so the paper roll is to the top, or using a wider width board for the outer frame, with a slightly narrower width board (for example a 1x4 frame with 1x3 shelves) to fit the support hinges.
My apologies to anyone having issues. Thank you to those of you who have left feedback, it is greatly appreciated. Ana
Preparation Instructions
Fill all holes with wood filler and let dry. Apply additional coats of wood filler as needed. When wood filler is completely dry, sand the project in the direction of the wood grain with 120 grit sandpaper. Vacuum sanded project to remove sanding residue. Remove all sanding residue on work surfaces as well. Wipe project clean with damp cloth.
It is always recommended to apply a test coat on a hidden area or scrap piece to ensure color evenness and adhesion. Use primer or wood conditioner as needed.
Source: https://www.ana-white.com/woodworking-projects/flip-down-wall-art-desk


Tidak ada komentar:
Posting Komentar